How to Prepare a Room for Painting

If you’ve read a lot of our other blogs, then you’re probably pretty excited to choose your color and get painting. However, there’s more to it than that. If you want the paint to last and you want a professional finish, then you have to prep correctly first! Below, we’ve come up with a brief guide on how to prepare a room for painting. Follow these steps so that you can follow the path to success!
Clear Out the Room
The first step to preparing a room is getting everything out. You may not be able to fit the couch back through, but anything that can be moved should be moved. It will make it easier if you have more space to work with. In addition, you can make it safer for yourself by putting anything you didn’t move out of the room to the middle of the room. The more space you have around the walls, the better!
Bare the Walls
Once you’ve got the room emptied out, get the walls cleared. It may seem obvious, but you should remove all paintings, wall hangings, light switches, and plug outlet covers. If you have lighting on the walls or ceilings, you can either remove the fixture completely or cover it with plastic and tape it down. Make your painting process easier by clearing the walls.
Repair and Clean
Here come the most important tips on how to prepare a room for painting. Filling holes, sanding down, and wiping up—it’s all essential for a successful project.
Fill Holes
Fill any holes with spackle. Paint doesn’t cover up holes or wall damages—that’s done with spackle. For small nail holes, put some spackle on your finger and rub it into the hole to fill it. For more noticeable holes or wall imperfections, spread spackle thinly with a putty knife. An important reminder: if you patch up any hole that’s larger than the size of a dime, make sure to spot prime that area, so the patch isn’t noticeable through the paint.
Sand Down
Once you’ve filled the holes, sand down the walls. You may think it’s excessive to sand down all areas, but this ensures smoother walls in the end. Get rid of any imperfections or uneven surfaces, and give yourself a canvas that’s easier to paint.
Clean Up
After spackling and sanding, wipe down your walls. Clean up any scuff marks and use a tack cloth to remove dust. The cleaner the surface, the better for the paint.
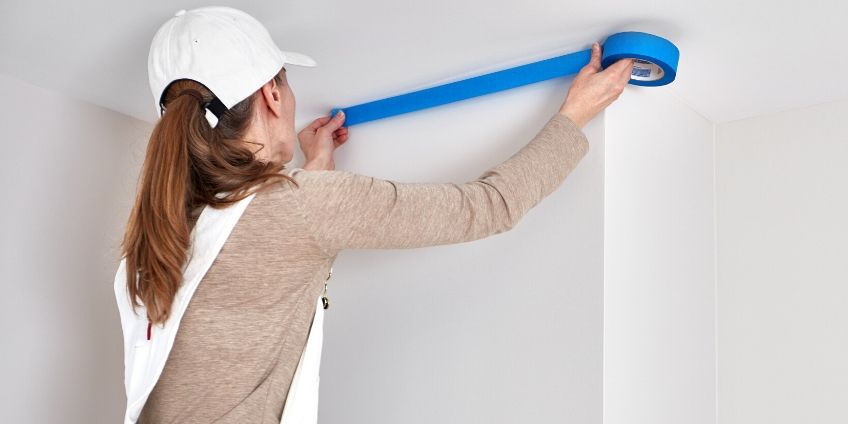
Tape Areas Off
If you don’t want paint on specific areas, then you need to tape them off. Use some painters tape (take your time) and go through to the different areas. Line baseboards, windowsills, and anywhere else you may not want your paint to go.
Protect the Space
When you’ve finished the steps above, you’ll have finished preparing the room for paint! This additional step is one you don’t want to forget, however. Make sure to cover up the floor with drop cloth; protect any furniture that’s still in the room. Paint splatters—protect your things!
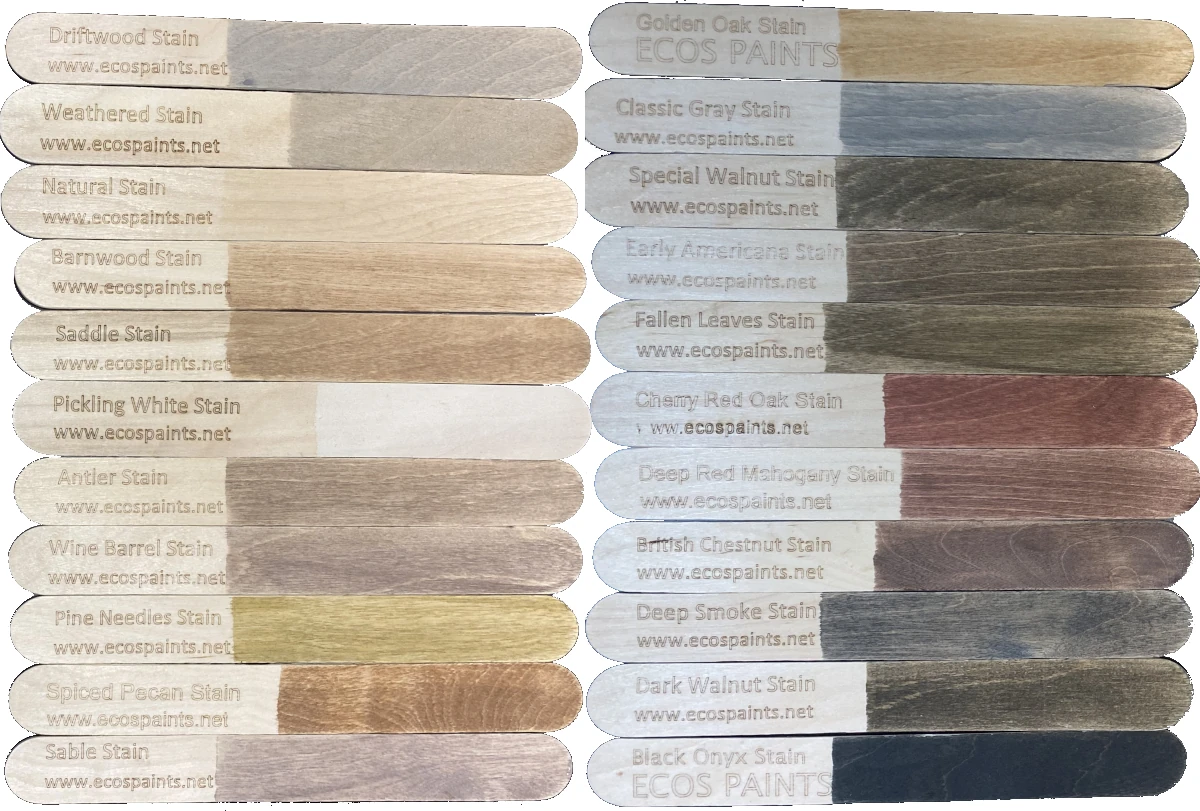
Your painting process will be a success when you choose paint from ECOS Paints. Our odorless* paints come in many colors and we have what you need for your home projects. We’ve got ceiling and wall paint, stains for furniture, paint for nurseries, and more. Shop now!
*Odorless: No traditional paint (polyurethane) odor, which can cause headaches, nausea, and respiratory issues.