How to Safely Paint a Toddler Bed in 6 Simple Steps
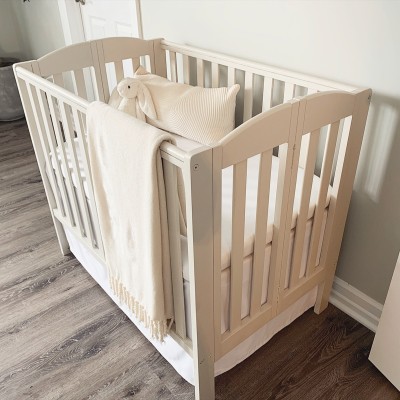
A toddler bed is the first step up from a crib into a big boy's or girl's bedroom world. Toddler beds that look great right out of the box may be out of the price range for something that will only be used for a few years. As Evelyn from Rage Against The Minivan puts it, finding a toddler bed is no small feat: “Most toddler beds look like converted cribs in cheap white wood. I found a few modern toddler beds I really liked, but I wasn’t about to spend nearly $1000 on a bed she would only use for a few years. So [designer cribs], while great-looking, were not an option.”
The easiest way to give a toddler bed a custom new look? Adding a fresh coat of paint! Painting your child’s bed comes with endless opportunity for customization. You can paint a colorful pattern or thematic scenery to match the rest of your child’s themed room, or simply let the solid coat of paint speak for itself. Luckily, giving a thrifty or hand-me-down toddler bed a paint transformation is easy as pie with our guide - How to safely paint a toddler bed in 6 simple steps!
A Note on Choosing the Right Paint
Your child will be spending a lot of time in and around this piece of furniture. It is of utmost importance that the paint you choose for this project has two qualities:
- Durability - Since toddlers are so active, proper paint application and finish are key. The paint should be of high quality and extremely durable. Paint that easily chips could be a future health hazard for your child (not to mention more touch-up work for you later).
- No VOCs - According to the EPA, paints with VOCs, or volatile organic compounds, emit chemicals that may cause both short- and long-term adverse health effects -- particularly for children. The importance of using a no-VOC paint for this project can’t be overstated. In fact, Healthy Child, Healthy World lists choosing no-VOC paints as the number one tip for a safe and healthy nursery.
How to Safely Paint a Toddler Bed in 6 Simple Steps
1: Test the furniture for lead paint. Older pieces of children's furniture (pre-1980's) may have been finished with paint containing lead -- unsafe for children and parents alike. Most hardware stores sell test kits that allow you to test for lead content with instant results. If the test comes back positive, you may want to consider finding a different bed to re-finish. If that's not an option -- do not sand the paint (the dust can linger for years posing repeated toxic exposures). Just paint right over the existing finish with at least 2-3 coats of paint to lock in the old finish.
2: Take apart the bed. While this step isn't totally necessary, it doesn help give the piece a more professional finish.
3: Place a tarp under and around the bed. Depending on the size of your child's room, you may want to disassemble the frame and complete the project in a larger space.
4: Prepare the bed for sanding. Wash the entire surface of the bed with soap and water, then let the bed air dry. Make sure to chip away peeling paint with a chisel or paint scraper to make the sanding stage much easier! (Note: Don't chip anything away if that lead test came back positive!)
5: Lightly sand the surface of the bed. Roughing up the surface will help the new paint stick. A 220-grit sandpaper should do the trick, but if the bed has a chipped or flaking paint finish, use a heavier 100-grit sandpaper to smooth the rough edges and finish with lighter sandpaper. Wipe off the dust from sanding with a damp cloth.
6: Time to paint! Apply at least one coat of primer and two coats of paint to the bed frame, allowing time to dry between coats. Be sure to not fill or seal any connecting slots or holes with paint. You may need to add extra coats if the old color is still showing through.
Do you have experience with painting a toddler bed? Add your painting tips in the comments below!